Overview
The following content explains how to use the Gerrit web interface to create and edit changes. Use the web interface to make minor changes to files. When you create a change in the Gerrit user interface, you don’t clone a Gerrit repository or use the CLI to issue Git commands — you perform your work directly in the Gerrit web interface.
To learn more, see the Gerrit User’s Guide.
Creating a Change
To create a change in the Gerrit web interface:
-
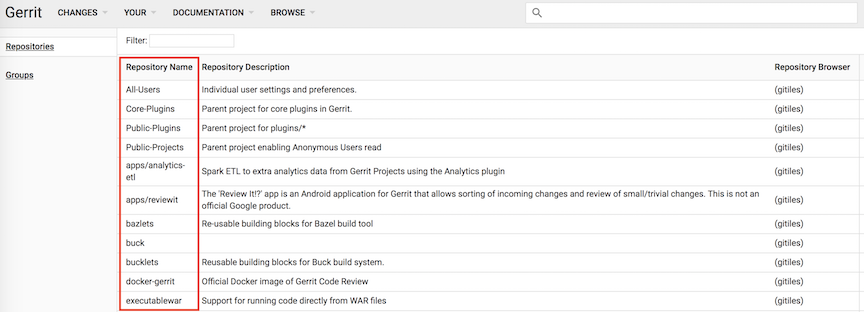
From the Gerrit Code Review dashboard, select Browse > Repositories.
-
Under Repository Name, click the name of the repository you want to work on. For example, Public-Projects. To find a specific repository, enter all or part of its name next to Filter:
-
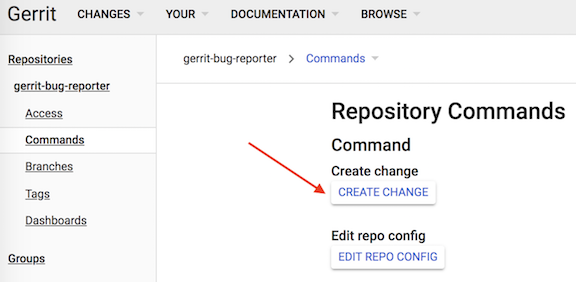
In the left navigation panel for the repository you selected, click Commands:
-
Under Repository Commands, click Create Change.
-
In the Create Change window, enter the following information:
-
Select branch for new change: Specify the destination branch of the change.
-
Provide base commit SHA1 for change: Leave this field blank.
ImportantGit uses a unique SHA1 value to identify each and every commit (in other words, each Git commit generates a new SHA1 hash). This value differs from a Gerrit Change-Id, which is used by Gerrit to uniquely identify a change. The Gerrit Change-Id remains static throughout the life of a Gerrit change. -
Description: Briefly describe the change. Be sure to use the Commit Message format. The first line becomes the subject of the change and is included in the Commit Message. Because the message also appears on its own in dashboards and in the results of
git log --pretty=oneline output, make the message informative and brief. -
Private change: Select this option to designate this change as private. Only you (and any reviewers you add) can see your private changes.
-
-
On the Create Change window, click Create. Gerrit creates a public Work In Progress (WIP) change. Until the change is sent for review, it remains a WIP and appears in your dashboard only. In addition, all email notifications are turned off.
-
Add the files you want to be reviewed.
Adding a File to a Change
Files can only be added to changes that have not been merged into the code base.
To add a file to the change:
-
In the top left corner of the change, click Edit.
-
Next to Files, click Open:

-
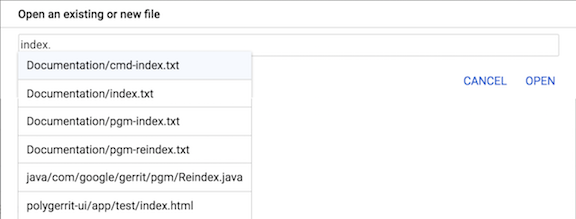
In the Open File window, do one of the following:
-
To add an existing file:
-
Enter all or part of the file name in the text box. Gerrit automatically populates a list of possible matching files:
-
Select the file you want to add to the change.
-
Click Open.
or,
-
-
To create a new file, enter the name of the new file you want to add to the change and then click Open.
-
Modifying a Change
To work on a file you’ve added to a change:
-
On the change page, click the file name. When you add a new file to a change, a blank page is displayed. When you add an existing file to a change, the entire file is displayed.
-
Update the file and then click Save. You must click Save to add the file to the change.
-
To close the text editor and display the change page, click Close.
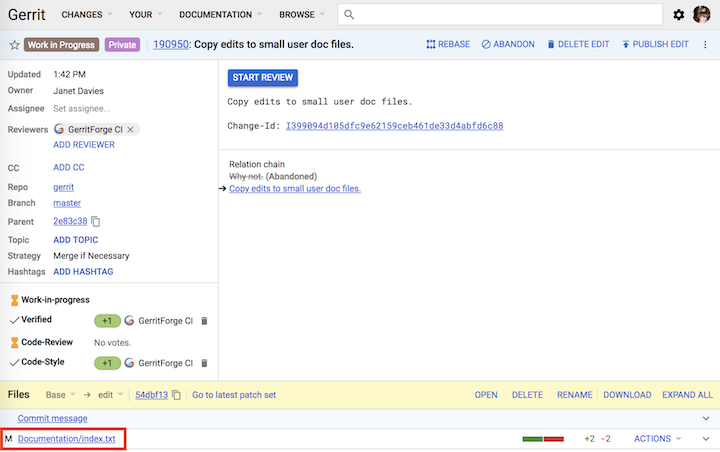
When you save your work and close the file, the file is added to the change and the file name is listed in the Files section. The letter displayed to the left of the file name denotes the action performed on the file. In this case, one file was modified:
-
M: Modified
-
A: Added
-
D: Deleted
-
-
When you’re done editing and adding files, click Stop Editing.
-
Click Publish Edit. When you publish an edit, you promote it to a regular patch set. The special ref that represents the change is deleted when the change is published.
Not happy with your edits? Click Delete Edit.
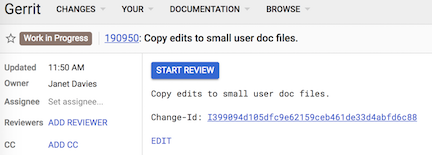
Starting the Review
When you start a review, Gerrit removes the WIP designation and submits the change to code review. The change appears in other Gerrit dashboards and reviewers are notified when the change is updated.
To start a review:
-
Open the change and then click Start Review:
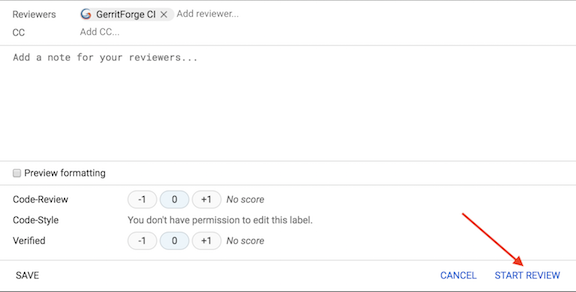
-
In the change notification form:
-
Add the names of the reviewers and anyone else you want to copy.
-
Describe the change.
-
Click Start Review:
-
The change is now displayed in other Gerrit dashboards and reviewers are notified that the change is available for code review.
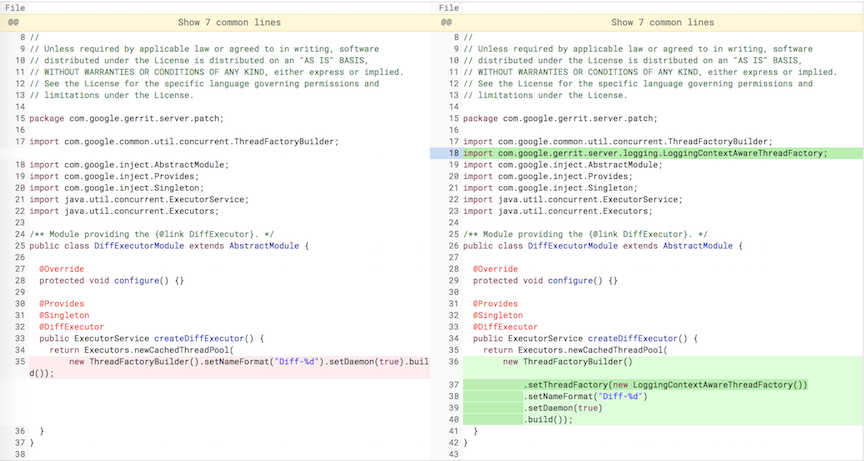
Reviewing Changes
Use the side-by-side diff screen.
It’s possible that subsequent patch sets may exist. For example, this sequence means that the change was created on top of patch set 9 while a regular patchset was uploaded later:
1 2 3 4 5 6 7 8 9 edit 10
Searching for Changes with Pending Edits
To find changes with pending edits:
-
From the Gerrit dashboard, select Your > Changes. All your changes are listed, according to Work in progress, Outgoing reviews, Incoming reviews, CCed on, and Recently closed.
For more information about Search operators, see Searching Changes. For example, to find only those changes that contain edits, see has:edit.
Modifying Changes
Rebasing a Change Edit
Only when a change is based on the current patch set can the change be published. In the meantime, if a new patch set has been uploaded, the change must be rebased on top of the current patch set before the change can be published.
To rebase a change:
-
Open the change and then click Rebase Edit.
If the rebase generates conflicts, the conflicts can’t be resolved in the web interface. Instead, the change must be downloaded (see below) and the conflicts resolved in the local environment.
When the conflicts are resolved in the local environment, the commit that
contains the conflict resolution can be uploaded by setting edit as an
option on the target ref. For example:
$ git push host HEAD:refs/for/master%edit
Downloading a Patch
As with regular patch sets, you can download changes. For example, as provided
by the download-commands plugin. Only the owners of a change and those
users granted the
accessDatabase global
capability can access change refs.
To download a change:
-
Open the change, click the More icon, and then select Download patch.
-
Copy the desired scheme from the Download drop-down.
-
Paste the command into a terminal window.

Part of Gerrit Code Review
SEARCHBOX