This page explains the workflow for creating and amending changes in the browser.
Creating a New Change
A new change can be created directly in the browser, meaning it is not necessary to clone the whole repository to make trivial changes.
The new change is created as a public work-in-progress change.
There are two different ways to create a new change:
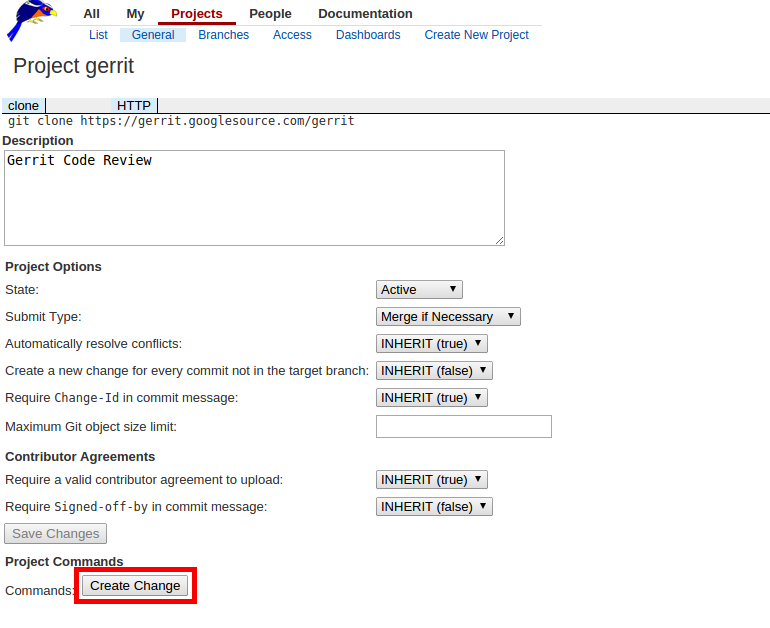
By clicking on the 'Create Change' button in the project screen:
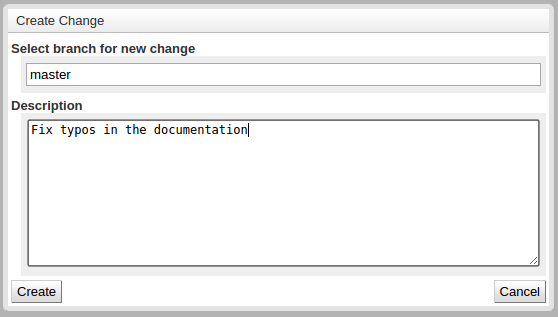
The user can select the branch on which the new change should be created:
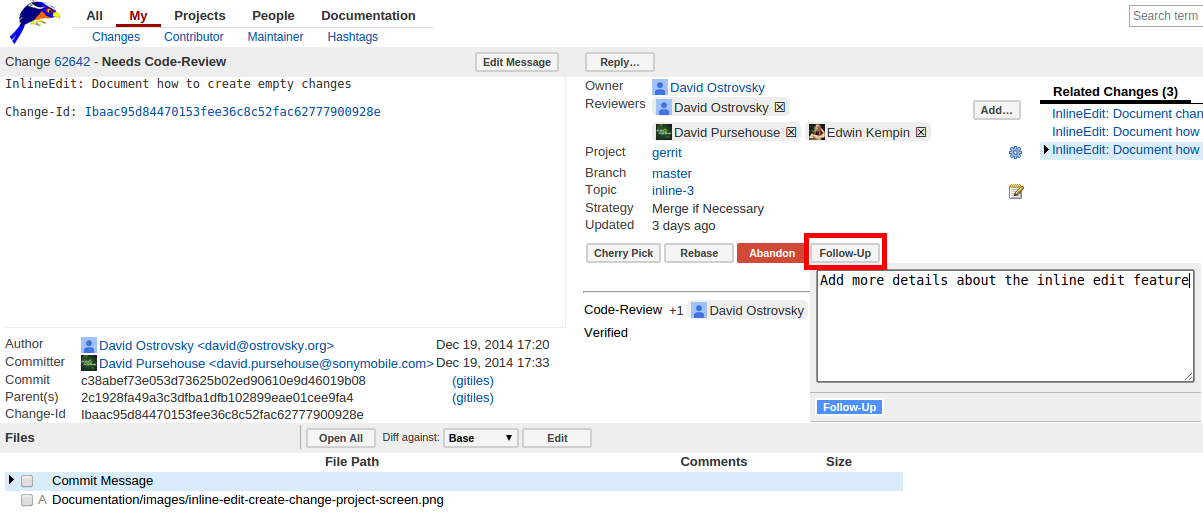
By clicking the 'Follow-Up' button on the change screen, to create a new change based on the selected change.
Editing Changes
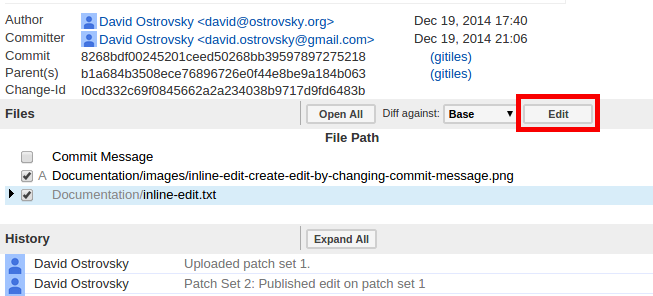
To switch to edit mode, press the 'Edit' button at the top of the file list:
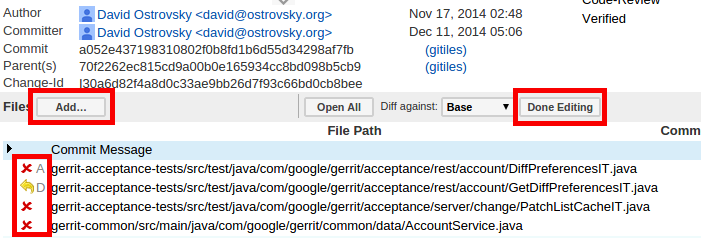
While in edit mode, it is possible to add new files to the change by clicking the 'Add…' button at the top of the file list.
File changes can be reverted or files can be removed from the change or deleted files can be restored, by clicking the icons to the left of the file name.
To switch from edit mode back to review mode, click the 'Done Editing' button.
While in edit mode, clicking on a file name in the file list opens a full screen editor for that file.
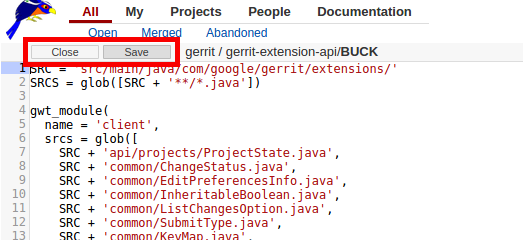
To save edits, click the 'Save' button or press CTRL-S. To return to the
change screen, click the 'Close' button.
Note that when editing the commit message, trailing blank lines will be stripped.
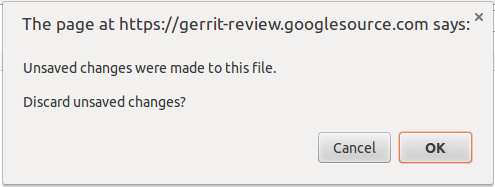
If there are unsaved edits when the 'Close' button is pressed, a dialog will pop up asking to confirm the edits.
To discard the unsaved edits and return to the change screen, click the 'OK' button. To continue editing, click 'Cancel'.
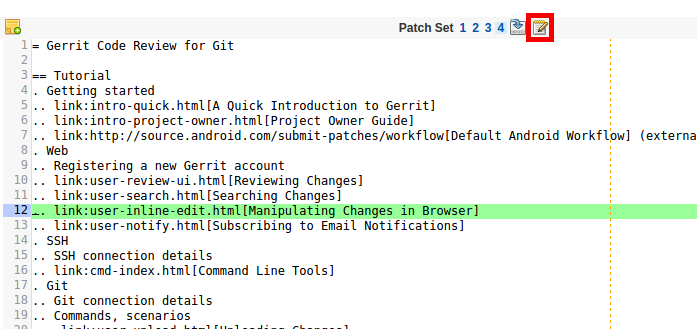
While in review mode, it is possible to switch directly to edit mode and into an editor for a file under review by clicking on the edit icon in the patch set list on the side-by-side diff view.
Reviewing Change Edits
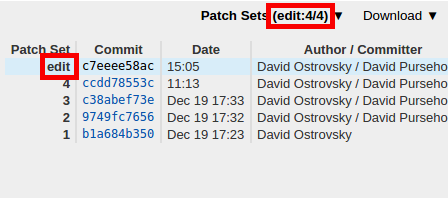
Change edits are reviewed in the same way as regular patch sets, using the side-by-side diff screen. Change edits are shown as 'edit' in the patch list on the diff screen:
and on the change screen:
Note that patch sets may exist that were created after the change edit was created.
For example this sequence:
1 2 3 4 5 6 7 8 9 edit 10
means that the change edit was created on top of patch set number 9 and a regular patch set was uploaded later.
Change Edit Actions
Change edits can be deleted, published and rebased, and a patch set that represents a change edit can be downloaded like a regular patch set.
There is a special ref for a change edit. When the change edit is deleted, this ref is deleted as well. To delete a change edit click on the "Delete Edit" button.
When a change edit is based on the current patch set, it can be published. By publishing a change edit it is promoted to a regular patch set. The special ref that represents the change edit is deleted on publish. To publish a change edit click on the "Publish Edit" button. This button is only shown when the change edit is based on the current patch set. Otherwise the change edit must first be rebased onto the current patch set.
Only change edits that are based on the current patch set can be published. If
in the meantime a new patch set was uploaded, the change edit must be rebased on
top of the current patch set before it can be published. Rebasing a change
edit is done by clicking on the "Rebase Edit" button. If the rebase results in
conflicts, these conflicts cannot be resolved in the browser. In this case the
change edit must be downloaded (see below) and the conflicts must be resolved in
the local environment. The commit that contains the conflict resolution can then
be uploaded by setting edit as option on the target ref:
$ git push host HEAD:refs/for/master%edit
Like regular patch sets, change edits can be downloaded by the download
commands (e.g. provided by the download-commands plugin). To download a
change edit, select the desired scheme from the "Download" dropdown and copy the
command to your terminal. Note: only change edit owners and users that were
granted the accessDatabase
global capability are able to access change edit refs.
To search change edits from the UI the has:edit predicate can be used.
Alternatively change edits can be accessed through "My ⇒ Edits" dashboard.
Not Implemented Features
-
Support default configuration options for inline editor that an administrator has set in
refs/users/default:preferences.configfile. -
Allow to rename files that are already contained in the change (from the file table). The same rename file dialog can be used with preselected and disabled original file name.
-
Changed files in change edit should be marked as changed in file table in edit mode. One option is to use dirty icon or "*" char in front of changed files, another option is to use different hyperlink color for changed files (red?), to avoid adding yet another column to the file table
-
Add navigation icons in header area of edit screen. When dozen files need to be changed in context of change edit, this is not the best workflow to open one file in edit screen, change it, save it, close edit screen and select next file from the file table to edit. "←" | "→" icons in header of edit screen could be used to navigate to the next file to change from the file table. This would behave like the navigation icons in side by side with the following logic on click:
-
"save-when-file-was-changed" or
-
"close-when-no-changes"
-
-
Implement conflict resolution during rebase of change edit using inline edit feature by creating new edit on top of current patch set with auto merge content
-
Similarly, reuse inline edit feature for conflict resolution during rebase of regular patch sets
Part of Gerrit Code Review
